Menu

Complete Guide: How to Properly Set Up Your Tattoo Machine for Precise and Efficient Work
Introduction
The tattoo machine is the most important tool for any tattoo artist. Proper setup directly affects the precision, smoothness, and longevity of a tattoo. A poorly adjusted machine can result in uneven ink distribution, shaky lines, or even skin trauma.
In this complete guide, we’ll cover everything you need to know about setting up tattoo machines (both coil and rotary), key parameters to adjust, and pro tips to optimize your tattoo equipment for the best results.
Understanding How a Tattoo Machine Works
Before diving into machine setup, it’s important to understand how a tattoo machine functions. There are two main types:
Why is proper setup crucial?
A poorly adjusted machine can lead to:
❌ Uneven ink distribution.
❌ Excessive trauma to the skin, leading to longer healing times.
❌ Unnecessary pain for the client.
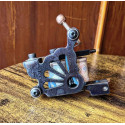
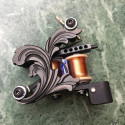
Adjusting a Coil Tattoo Machine
Choosing the Right Power Supply
Your power supply directly affects your machine’s responsiveness and stability. A good tattoo power supply should offer:
✅ Adjustable voltage between 4V and 12V, depending on the type of work (lining, shading, or color packing).
✅ Stable current output to avoid fluctuations that can damage the skin.
Adjusting Needle Stroke Length
The stroke length refers to the distance the needle travels in one cycle.
Contact Screw and Spring Adjustment
Proper alignment of the contact screw and spring helps optimize machine performance.
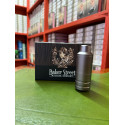
Recommended voltages: For Baker Rotary Machines
Adjusting a Rotary Tattoo Machine
Unlike coil machines, rotary machines require fewer adjustments, but certain parameters remain crucial.
Pro Tip: Machines like the Baker Nocturna allow ultra-precise tuning with a powerful motor.
Adjusting Needle Depth
Unlike coil machines, rotary machines require precise manual adjustment of needle protrusion:
Common Problems and Solutions for Coil and Rotary Machines
Here are some common issues and how to fix them:
|
Problem |
Cause |
Solution |
|
Machine overheating |
Voltage too high |
Lower the power supply voltage |
|
Needle scratching the skin |
Incorrect hand angle |
Maintain a 45° angle while working |
|
Ink not saturating properly |
Stroke too short |
Increase needle depth slightly |
|
Machine shaking |
Spring too soft |
Use a stiffer front spring |
Essential Equipment for Professional Tattooing
Besides properly setting up your tattoo machine, using high-quality tattoo equipment is key.
Tattoo Supplier – What Should You Choose?
At Baker Tattoo Supply, we provide:
✅ Professional tattoo machines (coil and rotary)
✅ REACH-compliant tattoo inks
✅ High-quality tattoo needlesand cartridges (Baker Advanced Cartridges)
✅ Reliable, long-lasting power supplies
A great tattoo artist needs a trusted tattoo supplier to ensure top-quality results!
Need the best tattoo equipment? Find our machines, inks, and professional supplies at Baker Tattoo Supply
Baker Waters Shader

Baker Waters Liner
Baker Perfect Electric en acier de damas

Baker Perfect Electric

Baker's Original Tattoo Pen Machine
Baker modded Jonesy Shader Edition Limitée

Baker Modifié Jonesy Liner Edition Limitée
Shadercoils 1 inch / 10 wraps190 gr

Liner coils 1 inch / 8 turns 180g
Baker McKeever Shader

Baker McKeever Liner
Baker Fatboy Pen
ShaderCoils 1 inch / 10 wrap190 gr

Linercoils 1 inch / 8 Tours190 gr
check_circle
check_circle
 Whatsapp