Menu

Zachariah Baker
(818) (3)
Tattoo Stencils , Tattoo Aftercare , Tattoo Machines , Tattoo Inks , Tattoo Needles , Tattoo Shop , Sponsored Artists , Tattoo History
Color packing is one of the most demanding tattooing techniques to master — but for artists working in traditional, neo-traditional, anime, and vibrant illustrative styles, it’s absolutely essential. These styles rely heavily on bold, saturated pigments, smooth transitions, and consistent color fields.
Your goal when color packing is simple:
Achieve a solid, even, fully saturated fill with no patchiness, streaks, or uneven tones.
Proper color packing results in a smooth, bright, long-lasting finish that sets professional tattoos apart from amateur work.
Understanding Color Packing and Saturation
Color Packing
Color packing means inserting pigment into the skin in a way that leaves no gaps, holidays, or visible inconsistencies. The entire area should appear unified and dense with color.
Saturation
Saturation refers to how evenly and deeply pigment is deposited.
Perfect saturation = pigment fully present in the skin, with no patchy or washed-out spots.
If your healed tattoos look dull or uneven, your saturation needs improvement.
How to Master Color Packing: Techniques & Best Practices
Below are the most important fundamentals every artist should understand when developing strong color-packing skills.
1. Skin Preparation & Needle Handling
Stretch the Skin
Why: Loose or wrinkled skin prevents even needle penetration and causes patchiness.
How: Use a three-point stretch or whatever hand position allows maximum tension for the area you’re working on.
Use Plenty of Ink
Why: Under-loading pigment leads to inconsistent results.
How: Keep dipping frequently and use any pooled ink on the skin during your passes.
In color packing, more ink is always better than not enough.
Control Your Needle Depth
Why: Incorrect depth causes poor saturation, blowouts, or excessive damage.
How:
Use Consistent Hand Motions
Why: Inconsistent movements create uneven saturation and trauma.
How:
Pick a technique — and stick to it. Consistency builds muscle memory.
Manage Your Voltage (Moderation is Key)
Why:
2. Solving Common Color-Packing Problems
Uneven Saturation
Problem: Patchiness caused by floating needles too high or inconsistent depth.
Solution:
Harsh Color Transitions
Problem: Abrupt edges or “walls” between colors.
Solution:
3. Additional Tips for Cleaner, Stronger Color Packing
Layering Your Colors
Apply dark to light.
Lighter tones often struggle to cover darker ones, especially after healing.
Use Black Sparingly (Unless You’re Packing Black)
Black adds contrast and structure — but too much can overpower the design.
For blackout work, the same rules apply: control depth, tension, and hand consistency.
Choosing the Right Black for Packing
If you’re struggling to pack black, you may be using lining ink by mistake.
Recommended blacks for packing:
For color inks, any high-quality brand works — the technique matters more than the bottle.
Time to Start Packing Color Like a Pro
Mastering color packing takes time, repetition, and patience — but these fundamentals will drastically improve your results. Over time, you’ll discover your own preferences and micro-techniques, but strong basics are essential.
Focus on the essentials:
✔ Stretch properly
✔ Control depth
✔ Keep motion consistent
✔ Saturate every inch
✔ Layer colors strategically
✔ Be patient
With practice and solid technique, your colors will heal brighter, smoother, and more professional than ever.
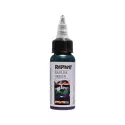
Radiant Evolved Naples Green 30 ml from the Radiant Colors Evolved range, ...
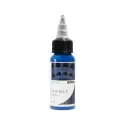
Radiant Evolved Lyon Blue 30 ml from the Radiant Colors Evolved range, com...
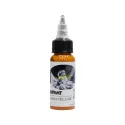
Radiant Evolved Lisboa Yellow 30 ml from the Radiant Colors Evolved range,...
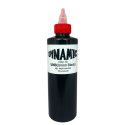
Dynamic Union Black 240ml compliant with REACH standard


check_circle
check_circle
 Whatsapp